Welcome

Showing posts with label Mini Cakes. Show all posts

September 26, 2008

Moving out! A Pear Gellate with its own Granita of red wine reduction.


There are so many changes in my life lately that I needed some kind of soul comfort, so in the past few days I've been cooking for others but not for me. And this time I decided to do it for me... Since I've been feeling moody, I thought of a country style pie that reflects everything that is going on lately in my life and most of all, it's done BY me and done FOR me. So I hope you can enjoy a little summer breeze with all of its good fortune and a farewell...


Here is the recipe:

For the crust:
Sugar 4 Tbsp
Vanilla extract 1 Tsp
All purpose flour 300g
Zest of one lemon and its juice
Butter 180g
A dash of salt
Egg yolk 1

1)In a food processor mix the flour, lemon zest and butter until it has the texture of coarse meal.
2)Add the sugar, vanilla extract, the egg yolk and 2 Tbsp of lemon juice (if the dough does not come together, just add more lemon juice) and pulse just until the dough comes together.
3) Chill dough for at least 30 minutes in the fridge.


Filling:

Sugar: 150g
Cinnamon Sticks: 2
Pears: 600g
Red wine: 375ml

1)Peel and slice the pears.
2)In a heatproof bowl pour the red wine, sugar and cinnamon stick and bring it to boil, keep boiling for 5 minutes.
3)Add the pears and cook for 10 more minutes at medium heat.
4)Remove pears and keep cooking until you've reached the syrup consistency (remember that once it's cooled it will get thicker). Set aside.


Pear and Red wine granita:

Red wine syrup: 1/2 cup
1 cooked pear.

1)Process the pear and the wine syrup and freeze for at least 2 hours.
2)once frozen, grasp with a fork the surface of the frozen liquid and that's your granita. Keep Chill until ready to serve.

Assemble:

1)Fold crust over pears in 5 folds, leaving some of the filling visible. Brush with egg wash and bake at 180C for about 30 to 40 minutes, until crust is brown.
2)Once out of the oven when it's completely cool, spread with some of the red wine reduction.
3)Serve warm, cool or at room temperature with the granita and a dollop of cream cheese with honey. Enjoy.


Tarta campestre de peras al vino tinto con granita en su almibar:

Estos ultimos meses han sido puro cambio en mi vida, y necesitaba algun tipo de comfort, y estos ultimos dias estuve cocinando para otros pero no para mi, asi que decidi hacer una tarta al estilo campestre que refleje la clase de comfort que necesitaba estos dias y lo mas importante es que esta hecho POR MI y PARA MI. Espero que la puedan disfrutar... con su de brisa de verano, su buena fortuna y una despedida...

Aca va la receta:


Para la masa:

Azucar 4 cdas
Extracto de vainilla 1 cdita
Harina 0000 300g
Limon 1
Manteca 180g
Sal una pizca
Yema 1

1)Rallar la cascara del limon y extraer su jugo.
2)Procesar la harina con la sal, la ralladura del limon y la manteca hasta obtener una masa arenada.
3)Agregar el azucar, el extracto de vainilla, la yema y una cucharada de limon, agregar mas jugo de limon si la masa lo requiere.
4)Continuar procesando hasta unir los ingredientes
5)Formar un bollo, cubrir con film y dejar reposar en la heladera por 30 minutos.

Relleno:

Azucar 150g
Canela en rama: 1
Peras: 600g
Vino tinto: 375ml

1)Pelar las peras, cortar en cuartos y retirar las semillas.
2)En una cacerola poner el vino, la canela y el azucar, llevar a hervor por 5 minutos.
3)Incorporar las peras y cocinar 10 minutos mas a fuego moderado.
4)Retirar las peras y dejar aparte.
5)Reducir el vino hasta obtener una consistencia de almibar.

Granita de Peras y vino tinto:

Almibar de vino tinto: 1/2 taza
Peras del relleno: 1

1)Procese la pera con el almibar y lleve a freezer haste que se congele (por lo menos 2 horas)
2)Rallar la superficie con un tenedor y servir en copas chicas.

Armado:

1)Estirar la masa sobre una superficie enharinada cortar circulos y cubrir la masa con algunas nueces molidas (opcional) dejando un borde libre de 3 cm aprox.
2)Encima acomodar las peras en forma de abanico y doblar los bordes de masa libre sobre las peras.
3)Pincelar con huevo batido y cocinar en horno precalentado a 180C por 30 a 40 minutos o hasta que los bordes esten dorados.
4)Una vez fria rociar con el almibar de vino y espolvorear los bordes con azucar impalpable.
5)Servir a temperatura ambiente,caliente o fria con una cucharada de queso crema mezclado con un poco de miel y servir con la granita. Que lo disfrutes!

August 04, 2008

For the love of "mini"


I always liked the small portions of food, those you can actually eat with your hands, and I must admit that I love doing them.
It's a charismatic attachment to those cuteness... so petit! I realize as well that it's hard work and you must have all the care in the world to manipulate them, but I the idea of how is going to be the final product, encourages me to cook them.
So most of the things you will see on this food blog will be PETIT, small. This is dedicated to all of you who read this blog.


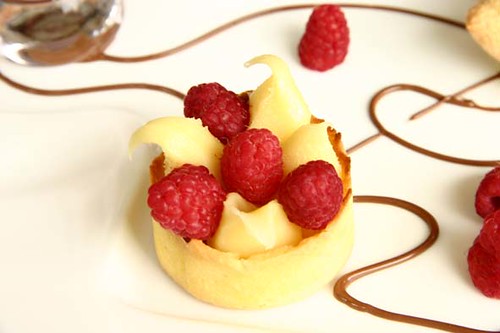
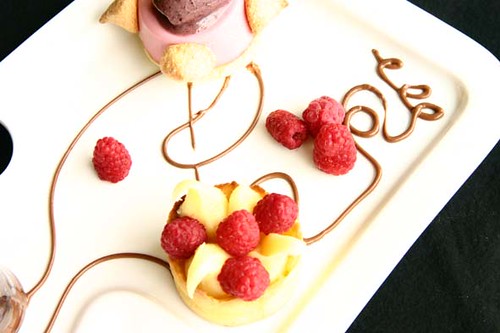
White chocolate Ganache with raspberries.

Here is the recipe
Make the dough:

Pate Sucrée

Yield: Enough for two 9 or 10-inch tarts

2 Sticks unsalted butter, softened but still cold
1/2 cup sugar
1/2 Tsp salt
2 large egg yolks, at room temperature
3 cups pastry flour, sifted
2 TBSP heavy cream


1.Place the butter in the bowl on a standing mixer fitted with a paddle attachment.Beat on low speed for 2 to 3 minutes, or until lightly creamed. Stop the mixer and scrape down the sides of the bowil. Add the sugar and mix for 30 seconds.

2.Add the salt and egg yolks, one at a time, scraping down the sides of the bowl after each addition.

3.Add the flour and mix until the dough just about comes together, about 30 seconds. Add the cream, then pulse the mixer on low speed for 15 to 30 seconds, or until de dough is smooth.

4.Remove the dough from the bowl and wrap it in plastic film. Chill for at least 4 hours. At this point, the dough will keep in the refrigetaror for up to 3 days or may be rolled out and frozen for up to a month.

5.When you remove the dough from the refrigerator, it will be very hard, because of the butter and sugar. To make it pliable enough to roll out, you must soften it without warming it up too much.

6.Roll out the dough into the tart shells.

7.To prebake, preheat the oven to 350F. Prick the bottom of the pastry shell a few times with the fork. Line the dough with a faux filling. Bake for 15 to 18 minutes. Remove the faux filling and bake for 6 to 10 minutes more, or until deep golden brown. Cool on a rack before using.


White chocolate Ganache:

8 ounces white chocolate
4 TBSP (1/2 stick) unsalted butter, softened.
1/4 cup heavy cream
1 TBSP light corn syrup
1 TBSP raspberry liquour or dark rum

1.Using a serrated knife, finaly chop the white chocolate into 1/4 inch pieces and place it in a medium heatproof bowl with the butter.
2.Bring the cream and corn syrup to a boil in a small saucepan over medium heat. Inmediately pour the hot cream over the chocolate. Tap the bowl on the counter to settle the chocolate into the cream, then let it set for 1 minute. Using a rubber spatula, slowly stir in a circular motion, starting from the center of the bowl and working out to the sides. Be careful not to add too much air to the ganache. Stir until all the chocolate is melted, about two minutes. When the mixture is smooth, stir in the rum or raspberry liquour.
3.Allow the temperature of the ganache to drop to 70 F. if the ganache is not going to be used right away, it can be stored in the refrigerator for up to 2 weeks. Use this ganache as a filling for tarts or cakes, thin it to make a sauce, or roll and coat it for truffles.

Assemble the cake:
Place a bit of ganache into the prebaked tart shell and garnish with some raspberries. Your dessert is now finished!

July 30, 2008

My first very own Daring Bakers Challenge!


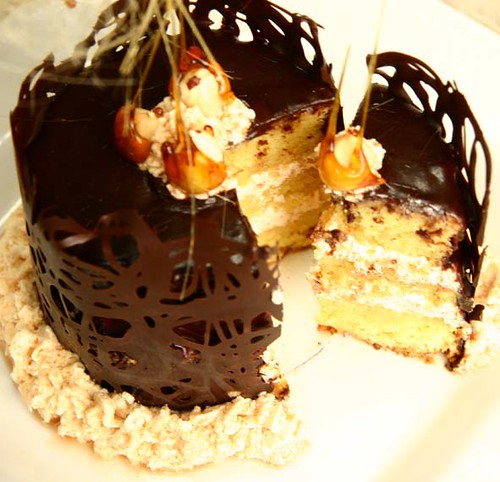
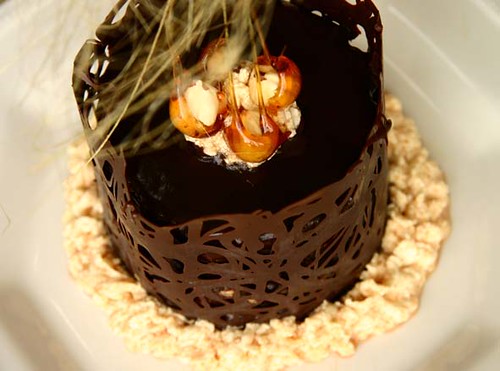
I have finally ended doing my Filbert Gateau with Praline Buttercream this past weekend, and I must admit that it takes a great deal of time in the kitchen, with the praline, with the syrup, with the gateau itseft and finally the decorating of the cake. I must tell you, it was hard work, but anyway... it's done.

I was really confused at the begining of the challenge because I read my emails with a little delay so I had to make my Filbert Gateau with little of anticipation, but it was all worth it.
I've tried to make a modern version of what I think a Filbert Gateau with Praline Buttercream would be for me nowadays... I kinda got lost in the way of doing that, but what the heck, It came out wonderfully, and of course it tasted amazing.
I made a mini gateau because we are only two to eat it... and of course my two dogs who actually enjoyed it as well as we did.
I have subtituted the hazelnut praline for an almond praline, so it work just as fine... I made the filbert genoise the night before assembling the cake, and the next day I made the filling, the praline, the praline buttercream, the syrup, the apricot glaze, the ganache and the decorating of the mini cake. It is important to say that I halved all the recipe, and it worked great.

I made the Filbert genoise with powdered almonds, instead of the hazelnuts because I didn't have so many hazelnuts on hand. Apart from that I make the cake following the original recipe. I didn't add whipped cream to the filling, just the praline buttercream.

I must admit, it tasted great. But the trouble in my kitchen... not gonna happen again, sorry...although I thought it was a great challenge.

I hope you enjoyed it, it's a great recipe, and we ate it the same day I finished assembling the cake.


There are amazing cakes all over other blogs! I must congratulate you all for a wonderful job.

July 25, 2008

An Ice Cream Maker!


I bought an ice cream maker! I'm so excited, so I think that from now on I will start producing tons of Ice Cream... well here are some, just to name a few:

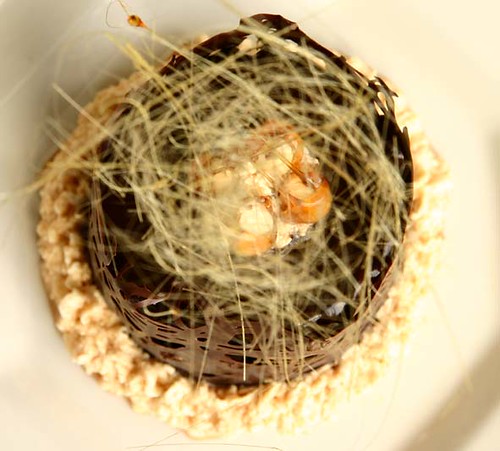
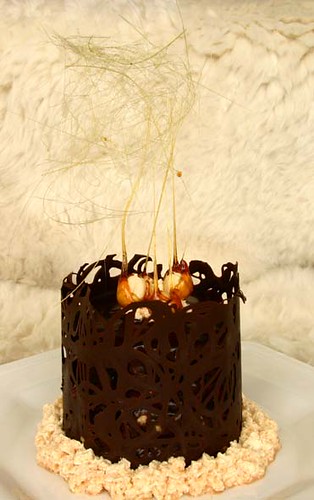
A cardamom Ice Cream I made yesterday with a caramel Walnut tartlets, they were deliciuos, and not because I made it... They are excellent for an afternoon tea or a great dessert, they're elegant and of course they're great in taste. The cardamom flavour goes extremely well with the caramel filling and the walnuts, which I also added some raisins as well. I hope you enjoy them.


Here is the recipe


Make the dough:

Pate Sucrée

Yield: Enough for two 9 or 10-inch tarts

2 Sticks unsalted butter, softened but still cold
1/2 cup sugar
1/2 Tsp salt
2 large egg yolks, at room temperature
3 cups pastry flour, sifted
2 TBSP heavy cream


1.Place the butter in the bowl on a standing mixer fitted with a paddle attachment.Beat on low speed for 2 to 3 minutes, or until lightly creamed. Stop the mixer and scrape down the sides of the bowil. Add the sugar and mix for 30 seconds.

2.Add the salt and egg yolks, one at a time, scraping down the sides of the bowl after each addition.

3.Add the flour and mix until the dough just about comes together, about 30 seconds. Add the cream, then pulse the mixer on low speed for 15 to 30 seconds, or until de dough is smooth.

4.Remove the dough from the bowl and wrap it in plastic film. Chill for at least 4 hours. At this point, the dough will keep in the refrigetaror for up to 3 days or may be rolled out and frozen for up to a month.

5.When you remove the dough from the refrigerator, it will be very hard, because of the butter and sugar. To make it pliable enough to roll out, you must soften it without warming it up too much.

6.Roll out the dough into the tart shells.

7.To prebake, preheat the oven to 350F. Prick the bottom of the pastry shell a few times with the fork. Line the dough with a faux filling. Bake for 15 to 18 minutes. Remove the faux filling and bake for 6 to 10 minutes more, or until deep golden brown. Cool on a rack before using.


For the caramel filling:

Granulated sugar 227g
lemon juice 1 tsp
Heavy cream, warmed 1/4 cup
unsalted butter 72g
Chopped walnuts, 114g


1.Caramelized the sugar with the lemon juice in a heavy-bottomed saucepan.
2.Cook, stirring constantly with a wooden spoon, until de mixture reaches a light brown color, 335 F (168 C). Remove from the heat.
3.Quickly add the cream and swirl it around to mix (the cream must be warmed first)
4.Stir in the butter, then the walnuts, and the raisins (if you like them)
5.Fill the tartlets and bake them at 325 F (163 C) for 12 minutes or until the tops are baked (they should only have a very light golden color. (Do not bake tartles in a hotter oven or longer thatn necessary or you risk having the filling boil over, making it impossible to remove the tartlets from the forms. It happen to me with one of them... don't get distracted!)


Mis queridos amigos de habla española, mañana tendran la receta subtitulada... hoy no pude, saludos!

Not summer for us here...but still enjoying some frozen raspberries


I've been seeing a lot of raspberries everywhere, and I'm an absolute fan of them. But since it's no summer time here in Argentina, I used my frozen raspberries from the previuos summer which with most of my patience I had dedicated those days to buy a bunch in a farm not far from where I live, and just lined them one by one next to each other so that they don't touch... and finally frozen them. So... Today I had the hunger to use some. I just wanted them for a nice afternoon tea which I enjoy so much having along with my husband and my two dogs.
I decided to give the raspberries the sour contrast with a mild lemon curd, although they are both sour, they get along wonderfully.


So now I present you the recipe:

Make the dough:

Pate Sucrée

Yield: Enough for two 9 or 10-inch tarts

2 Sticks unsalted butter, softened but still cold
1/2 cup sugar
1/2 Tsp salt
2 large egg yolks, at room temperature
3 cups pastry flour, sifted
2 TBSP heavy cream


1.Place the butter in the bowl on a standing mixer fitted with a paddle attachment.Beat on low speed for 2 to 3 minutes, or until lightly creamed. Stop the mixer and scrape down the sides of the bowil. Add the sugar and mix for 30 seconds.

2.Add the salt and egg yolks, one at a time, scraping down the sides of the bowl after each addition.

3.Add the flour and mix until the dough just about comes together, about 30 seconds. Add the cream, then pulse the mixer on low speed for 15 to 30 seconds, or until de dough is smooth.

4.Remove the dough from the bowl and wrap it in plastic film. Chill for at least 4 hours. At this point, the dough will keep in the refrigetaror for up to 3 days or may be rolled out and frozen for up to a month.

5.When you remove the dough from the refrigerator, it will be very hard, because of the butter and sugar. To make it pliable enough to roll out, you must soften it without warming it up too much.

6.Roll out the dough into the tart shells.

7.To prebake, preheat the oven to 350F. Prick the bottom of the pastry shell a few times with the fork. Line the dough with a faux filling. Bake for 15 to 18 minutes. Remove the faux filling and bake for 6 to 10 minutes more, or until deep golden brown. Cool on a rack before using.


For the Lemon Curd:

Yield: About 2 cups

2/3 sugar
2 TBSP finely chopped or grated lemon zest
3 large eggs
4 large egg yolks
1/2 cup fresh lemon juice
1/4 cup fresh lime juice
4 TBSP (1/2 stick) unsalted butter chilled and cut into 1/2 inch cubes


1.Prepare an ice bath, using a large bowl to hold the ice.
2.Combine the sugar and lemon zest in a food processor and pulse until de sugar is yellow and very fragant, about 1 minute.
3.Combine the lemon, sugar, eggs and egg yolk in a medium heatproof bowl and whisk together for 30 seconds, to distribute the sugar evenly, which prevents premature coagulation. Whisk continuously for 15 seconds, or until the suggar is dissolved. (If you feel grains, continue to whisk)
4.Add the lemon and lime juices and cook, whisking continuously, for about 5 minutes. Use a rubber spatula to scrape the sides and bottom of the bowl from time to time. The curd is done when it has the consistency of sour cream and a temperature of 160 F.
5.Transfer the curd to a food processor or a large bowl. Pulse while you add the butter, piece by piece, or whik it in by hand. Once all the butter has been added, pulse or whisk for 10 seconds, or until the mixture is homogenous.
6.Strain the curd through a fine-mesh strainer back into the bowl and set it in the ice bath to cool.Cover with plastic film. It can be refrigerated in an airtight container for up to 1 week.


Assemble

Once the tart shells had cooled, filled them with the luciuos lemon curd and add on top some raspberries.
If you have too much of lemon curd you could use it with those scones I made yesterday... mmm how yummy is that?!

June 29, 2008

Banana Cake


Bananas and Chocolate, that's what I'd like to say a perfect combo... Tomorrow I'll give you the recipe, but first a check out the view...

Most of the times you spend your life running … I don’t know why, but we do… maybe it’s because life’s too short, someone would say… but I find that there’s nothing sweeter and comforting that to stop your watch for a while and just try to concentrate on the person that you have beside you. It’s a show of affection and redemtion to our beloved ones and just dedicate some time to them. And by doing that I mean to stop and realize that all we have is now. And the person who is right next to us (whether is only you, your cat/dog/bird or a spirit) is joining in this race that we face everyday we wake up. So before you begin making this wonderful mini gateux have everything at hand.

For the Banana moist interior:

Butter: 65g
Brown sugar: 100g
1 medium egg, lightly beaten
2 medium ripe bananas, that weight aprox. 150g
Yogurt: 2 TBSP
All purpose flour: 100g
Baking Soda: ½ TSP
A dash of salt.

1.Preheat oven at 170 C. Cream butter and sugar together until light and fluffy. Add the egg and blend in. In another bowl, mash the bananas and combine them with the yogurt.
2.In another bowl sift the flour, salt and baking soda. Add the flour to the butter mixture alternatively with the bana mixture in three additions.
3.Bake the mixture in individual silicon molds or any mold that you have at hand for 30 to 40 minutes, depending on the size of the mold you have chosen. Once out of the oven let it cool before cutting.

For the caramel center:

Cream: 120g
Vanilla extract: 1 TSP
Sugar: 30g
Unflavored gelatin (powder): 1g
Salt: 1 TSP
Nuts or ground almonds if you like something crunchy in your mouth.

1. Sprinkle the sugar on a small saucepan. Make a dark caramel with the sugar. Add the vanilla bean and the cream that we have previously warm up. The caramel will bubble up when we add the cream so make sure to be careful not to get burnt and whisk constantly.

2.Temper this mixture into the egg yolks. It will be so hot and the amounts we are working with are so small, that there is no need to return this mixture back to the heat. The temperature of the caramel will pasteurize the egg yolks.

3.Add the softened gelatin to the base and strain the whole thing through a fine sieve.

4.Pour this into the mini muffin pan. We want to have about 4 mm high of the cream. then we will sprinkle some powdered ground almonds or whatever you have at hand on top of the cream . The whole thing goes in the freezer until we are ready to assemble the cake.

Chocolate Mousse
makes enough for 4 ring molds

150 grams 70% chocolate, melted
450 grams organic heavy cream, whipped to soft peak.

1.Melt the chocolate over a double boiler. Remove from the heat. Add a third of the soft peak whipped cream to the chocolate while whisking. Work quickly so the chocolate doesn't set too fast. Add the rest of the cream but this time fold using a spatula.

2.Now that we have the mousse made, we should assemble the cake. If we transfer the mousse to the refrigerator, it will harden too much and we will not be able to pipe it as smoothly into the ring molds. So have all your components ready to go.

Assemble the cake:

1.If you use individual ring molds try to place them onto a plate before assembling the cake, and cut parchment paper strips that will fit the inside of your ring molds and line the molds with the paper.
2.Cut a slice of the banana cake that we made before from the same size as we did the caramel interior.
3. Pipe some mousse inside each one of the molds. Insert the filling disks inside each mold. Top with a little bit more mousse, another disk of the filling and top with some more mousse.
4. Flatten the top of the mold eliminating any excess mousse. We want a flat and smooth top.
Place these in the freezer to set. When they are frozen, push the mousse out of the mold and place it on your plate or cake board.
5.Once done all this, glazed with the chocolate mixture and put the mini cakes in the refrigerator to set. Serve and enjoy with your love ones.

Chocolate Glaze

110 grams bittersweet chocolate
110 grams coating chocolate
35 grams vegetable oil

1. Melt all the ingredients together over a double boiler and keep warm until we are ready to assemble.


Bananas y Chocolate, una de las tantas perfectas combinaciones... mañana publicaré la receta, pero primero una ojeada a la mini "torta"...


La receta:

A veces uno lleva su vida corriendo porque el tiempo es escaso, pero no encuentro nada mas lindo y reconfortante que detener el reloj y concentrarme en la persona o personas que voy a agasajar ese dia, Es una muestra de afecto y redencion a lo que mas queremos y a ello debemos dedicarle tiempo. Parar y darnos cuenta de que todo lo que tenemos es el ahora y el ser que esta junto a nosotros que nos acompaña en esta carrera de todos los dias. (Aunque seas vos y tu gato/perro/pajaro o ser imaginario).
Es importante que antes de comenzar este postre tengas todo preparado y a mano.
Es un postre que vale la pena el esfuerzo, pero si tu eres de no estar en la cocina por mucho tiempo, entonces no te lo aconsejo, ya que lleva pasos que deben ser premeditados.

Para el interior humedo de banana:

Manteca 65g
Azucar Rubia o negra 100g
1 huevo mediano, ligeramente batido
2 bananas machacadas, que pesen aprox. 150g
Yogur 2 Cucharadas
Harina Integral 25g
Harina 0000 75g
Bicarbonato de sodio 1/2 Cucharadita
1 pellizco de sal.


1.Caliente el horno a 170 C. Haga una crema con la manteca y el azucar hasta que quede ligera y espumosa. Agregue, batiendo, el huevo y mezcle bien. En otro cuenco, combinar las bananas machacadas con el yogur.

2.Tamizar las harinas, el bicarbonato y la sal en otro cuenco. Incorporar a la mezcla de manteca y huevo alternando con las bananas.

3.Pasar la mezcla a un molde, o moldes individuales engrasados y hornear por 30 a 40 minutos, de acuerdo al tamaño del molde que uses. Retirar del horno y dejar reposar por 10 minutos antes de desmoldar. Dejar enfriar del todo antes de cortar.


Para el centro de caramelo:

Crema de leche o leche 120g
Esencia de vainilla 1 cucharadita, o 1 vaina de vainilla.
Azucar 30g
Gelatina sin sabor en polvo 1g
Sal 1cdita.
Nueces o almendras picadas cantidad necesaria.

1.Poner en un cazo el azucar. Hacer un caramelo oscuro. Mientras calentar la crema/leche en otra cacerola con la vaina de vainilla o la esencia.

2.Sacar el azucar del fuego y agregar la crema/leche caliente y revolver constantemente, es normal que burbujee asi que cuidado. Si partes del caramelo quedaran sin unir, llevar a fuego nuevamente hasta que se hayan disuelto.

3.Ablandar la gelatina con 5g de agua fria. Volcar la preparacion anterior a la gelatina y revolver constantemente. Colar la mezcla.

4.Volcar la preparacion en moldes mas pequenos del que vamos a utilizar para luego unir todo. Debe ser aunque sea unos 3 a 5 cm mas pequeño.

5.Colocar nueces o avellanas trozadas por encima y congelar hasta el momento de armar la mini torta.


Para la Mousse de Chocolate:

Aca viene la parte "gorda". Esta receta es muy buena porque se logra una mousse muy sostenida. Lo cual es importante para luego armar la torta.Si tienes una receta menos "gorda" puedes cambiarla tranquilamente.

Chocolate Semiamargo de buena calidad (esto es importante) 150g
Crema de leche batida a medio punto 450g (si es mucho, pero suficiente como para cuatro moldes individuales o uno grande)


1.Derretir el chocolate sobre un baño maria. Retirar del fuego. Agregar un tercio de la crema batiendo rapidamente para que el chocolate no se ponga demaciado duro. Agregar el resto de la crema con una espatula pero esta vez de forma envolvente hasta que se haya unido todo el chocolate con la crema.Reservar. Si no vas a armar la torta ahora reservar a temperatura ambiente, pero no por mucho tiempo.

Armado de la mini torta:
1.Si se utilizan moldes individuales, tratan de colocarlos todos encima de una placa o plato. Colocar en los bordes y en el fondo papel manteca.

2.Cortar el budin de banana que hicimos anteriormente del mismo tamaño que hicimos el relleno de caramelo.

3.Pasar la mousse a una manga para trabajar mejor, y si no tienes manga, puedes utilizar una cuchara o espatula o lo que tengas a mano como para que la preparacion quede prolija.

3.Poner un poco de la mousse en iguales cantidades dentro de los moldes.

4.Colocar encima un lonja del budin de banana y la crema de caramelo que congelamos anteriormente. Presionar levemente.

5.Volver a introducir mousse y si te alcanza otro disco de masa de banana.

6.Cubrir con mas mousse y aplastar la parte superior con ayuda de una espatula plana o cuchillo, para eliminar el exceso de mousse. Queremos que quede la preparacion bien al ras de la parte superior del molde.

7.Llevar al congelador de 2 a 4 horas. Cuanto mas tiempo dejes la mousse en el congelador mejor vas a poder desmoldarla luego.

Para el glaseado de Chocolate brillante (se debe realizar media hora antes de desmoldar y querer servir las tortitas):

Agua 180g
Azucar 225g
leche en polvo 40g
Cacao en polvo 50g
Crema de leche 300g
Gelatina sin sabor en polvo 5g


1.Poner el agua con el azucar y la leche en polvo en un cazo y cocinar hasta que empiece a calentarse, en ese momento añadir el cacao y la crema.Cocinar hasta que alcance los 102 C, o si no dispones de un termometro, hasta que con una cuchara al retirar un poco de la mezcla, forme como un hilo flojo entre los dedos cuando lo tocamos.

2.Retirar del fuego y dejar enfriar por unos 15 minutos. Es conveniente pasar la mezcla a otro cazo para que se enfrie mas rapidamente.

3.Incorporar la gelatina previamente remojada en 15g de agua fria. Colar y dejar que siga enfriando hasta que puedas meter un dedo y este a la misma temperatura que tu dedo.

4.Por ultimo, retirar las tortitas del freezer. Disponerlas sobre una rejilla o sobre un papel manteca u otro papel que puedas luego tirar. Bañarlas con el glaseado y decorar con cacao en polvo por encima o si quieres un contraste un poco mas notorio con azucar impalpable, y algunas flores o pedacitos de chocolate o con lo que tu mas te guste. La decoracion siempre es a gusto personal.

5.Una vez decoradas, ponerlas en la heladera para que el glaseado quede firme. Se puede servir directamente o tambien se puede realizar todo el dia anterior. Cuanta mas antelacion tengas con este postre mejor te va a quedar.